A sandy beach is often the easiest place for a beginner to photograph breaking surf because it offers room to work, a clear view of the waves, and a forgiving place to stand while learning composition and timing. The advantage is practical, not absolute: wind, tides, crowds, and shorebreak can still create hazards, and sand alone does not make a beach safe. Guidance from the National Park Service and U.S. Coast Guard supports checking local conditions and keeping clear of hazardous water. This guide explains why beaches help beginners, how to choose a viewpoint and basic camera settings, what safety practices matter, and how a simple beach shoot can build skills.
Beach access makes surf photography easier for beginners
Surf photography is the practice of making images of waves, surfers, and coastal activity. A beach is a broad, accessible shooting environment where a beginner can photograph surf from shore without immediately needing a boat, water housing, or experience swimming with a camera. The shoreline also provides a stable place to observe how waves arrive, break, and recede before choosing when to take a picture.
The U.S. Geological Survey describes beaches as dynamic landforms shaped by waves, tides, currents, and sediment. That variability is part of their appeal and their challenge: the scene changes continually, so photographers can practise timing and framing in one location. Beaches are not inherently safer than other settings, however. Rip currents, sudden shorebreak, unstable sand, and changing tides can put people at risk even when the water looks calm.
Open sightlines make composition easier to learn
A beach often gives photographers a comparatively unobstructed view of incoming waves. From a safe position above the waterline, a beginner can watch several sets, identify where waves tend to break, and decide whether to include the horizon, shoreline, or a person for scale. This makes it easier to practise basic composition without moving through crowded streets or navigating complicated terrain.
A useful starting frame includes one main subject, such as a breaking wave, with enough surrounding water or sky to show its shape. Keeping the horizon level helps the image feel deliberate. If the frame includes a surfer, placing the person toward one side can leave space in front of their direction of travel.
Room to move supports patient practice
Wide stretches of sand can provide room to adjust position and compare different angles without crowding other beachgoers. Beginners can take time to observe the sets, review images, and try again. A simple exercise is to photograph the same section of surf from a fixed spot for ten minutes, then compare which moments best show the wave’s form.
That space is not guaranteed: popular beaches can be crowded, and access may be restricted by dunes, wildlife protections, or local rules. Keep clear of nesting areas and marked conservation zones, and avoid blocking paths or placing equipment where people walk.
Beach viewpoints build foundational surf-shooting skills
A beach viewpoint is a safe position on shore from which a photographer can see the surf and make images without entering the water. For beginners, the main options are a dry-sand view, an elevated or distant shoreline view, and a closer view from a permitted area near the water. Each changes the apparent scale and shape of the waves, so moving a short distance can produce a noticeably different photograph.
Dry-sand shooting is the simplest starting point
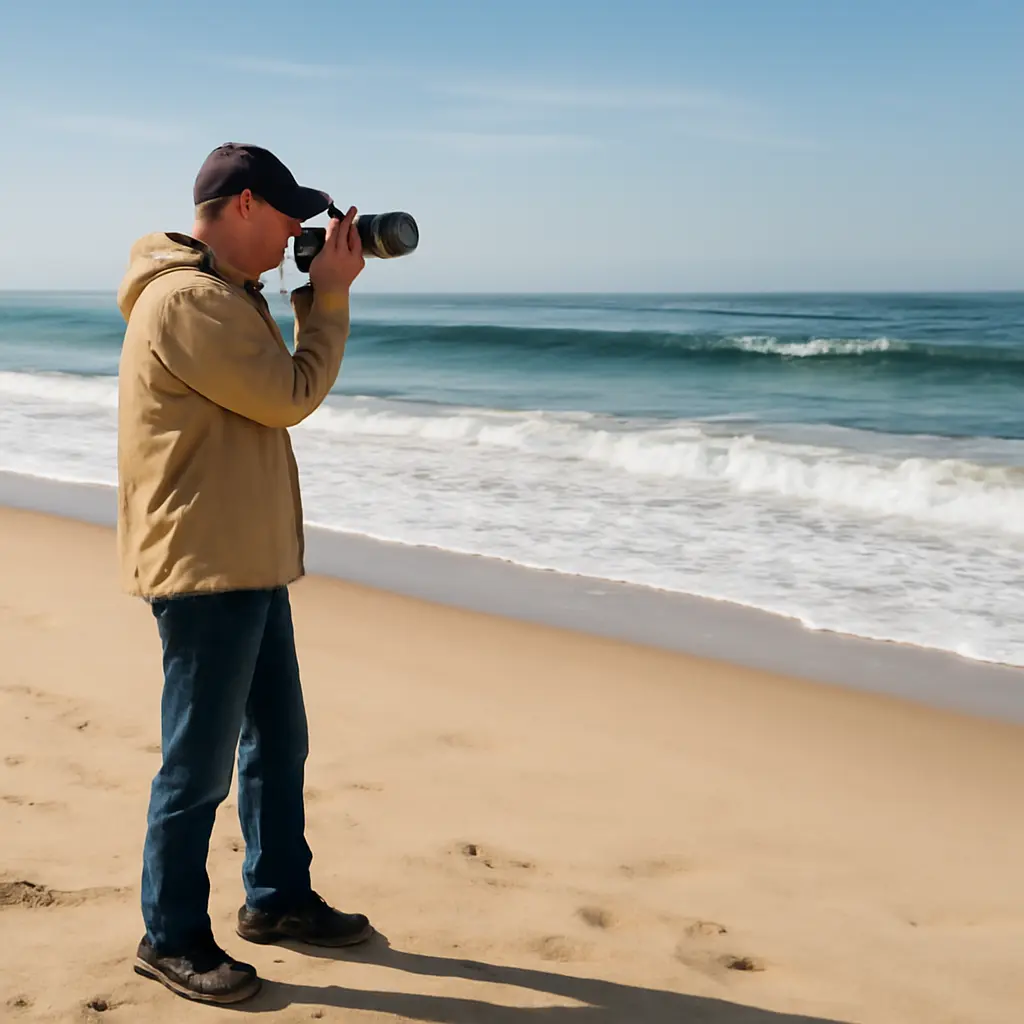
Dry-sand shooting means photographing from well back from the water’s edge, with enough distance to account for unexpected waves. It is a straightforward way to learn how the camera responds to bright sand, reflective water, and moving subjects. A standard zoom lens is often sufficient for broad wave scenes; a longer lens can help frame distant surfers, but it is not essential for learning timing and composition.
Use a camera strap, keep gear off the sand when possible, and avoid changing lenses in blowing sand. A sealed bag or protective cover can reduce exposure to spray and grit, but it does not make equipment waterproof. Check the camera maker’s care guidance after shooting near saltwater.
Elevated viewpoints reveal wave patterns
An elevated viewpoint, such as a designated overlook or safe bluff-top path, can show more of the wave lineup and the shape of the coastline. From above, repeating bands of swell and foam may become clearer, which helps a beginner understand where a wave is likely to break. Stay on marked paths and away from eroding cliff edges; a better angle is never worth standing on unstable ground.
Closer shoreline views require extra caution
A close shoreline view can make waves feel larger and more immediate, but it also puts the photographer nearer to shorebreak and rapidly advancing water. The National Weather Service warns that dangerous waves can sweep people off beaches and coastal rocks. Watch the water continuously, keep an escape route open, and move back well before waves reach your position. Do not turn your back on the ocean while framing or reviewing images.
Beginner surf camera settings balance motion and light
Camera settings are the controls that determine exposure and how motion appears in a photograph. Surf is a moving subject, while beaches often contain bright sand and reflective water; beginners therefore benefit from learning shutter speed, aperture, and ISO as a connected set rather than relying on one universal preset.
Shutter speed controls the appearance of wave motion
Shutter speed is the length of time the camera sensor records light. A faster shutter speed can make a breaking wave or surfer appear sharper, while a slower speed can blur foam and convey movement if the camera is steady. There is no single correct speed: the needed setting depends on wave speed, subject distance, lens focal length, and available light.
For a first session, try a relatively fast shutter speed for action, then review the result and adjust. Use continuous autofocus or subject tracking if the camera offers it, and take short bursts when a wave reaches its peak. Bursts can improve the chance of catching a decisive moment, but careful timing and selection matter more than taking large numbers of frames.
Aperture and ISO help manage changing brightness
Aperture controls the lens opening, affecting both the amount of light and how much of the scene appears in focus. ISO describes the sensor’s sensitivity setting; raising it can help maintain a faster shutter speed in dimmer light, but may add visible image noise. On a bright day, a low ISO is often practical, while cloudy conditions may require a higher setting or wider aperture.
Because pale sand can mislead automatic exposure systems, review the image and exposure warning indicators if available. Avoid judging brightness only from the camera’s rear screen, which can look different in strong daylight. A histogram can help show whether important highlights have been lost, although it takes practice to interpret.
Light changes the mood and detail of the surf
Low-angle morning or late-afternoon light can add texture to water and sand, while high midday sun may create strong contrast and bright reflections. Overcast weather can soften shadows, though it may reduce light for freezing action. The National Oceanic and Atmospheric Administration notes that tides and coastal conditions vary by location; checking a local tide forecast alongside the weather helps photographers plan access and understand how the shoreline may change.
Beach safety and preparation protect people and equipment
Beach safety is the set of practices used to reduce risks from surf, tides, weather, and coastal terrain. The easiest place to shoot is only useful if the photographer can work without endangering themselves or others. Before setting up, check local beach advisories, weather, tides, and lifeguard guidance; conditions can change during a session.
Rip currents and waves are hazards even from shore
A rip current is a narrow, fast-moving flow of water that travels away from shore. The National Oceanic and Atmospheric Administration’s National Weather Service identifies rip currents as a major surf-zone hazard and advises beachgoers to use lifeguarded areas and heed warning flags. Photographers should not enter the water to retrieve gear, and should never position themselves where a retreating wave could cut off their route back to dry ground.
The U.S. Lifesaving Association reports that rip currents account for more than 80% of beach rescues by lifeguards in the United States. The statistic is a reminder that apparently ordinary surf can conceal serious risk; it is not a reason to approach the water for a better photograph.
Salt, sand, and spray call for equipment care
Salt spray can leave residue, while fine sand can work into buttons, rings, and lens mechanisms. Keep equipment in a closed bag when not in use, avoid placing it directly on the ground, and do not wipe gritty surfaces with a dry cloth. After the session, follow the manufacturer’s cleaning instructions and use appropriate tools to remove loose particles before wiping equipment.
Local rules and wildlife protections shape where you can shoot
Beach access rules vary by park, municipality, and season. Some locations restrict tripods, commercial photography, drone use, or entry into dunes and habitat areas. The National Park Service asks visitors to protect coastal wildlife and stay on designated routes where required. Check posted signs and local agency information before the shoot, and give wildlife and other visitors generous space.
A simple beach shoot turns observation into practice
A beginner can learn more from a focused practice session than from trying to master every camera feature at once. Choose a lifeguarded or otherwise well-managed beach, arrive with enough daylight, and first observe the water from a safe location. Then make a small set of photographs with one goal, such as freezing a wave crest or keeping the horizon level.
- Check weather, tide information, beach advisories, and access rules before leaving.
- Choose a stable position well back from the water and away from cliffs, dunes, and restricted habitat.
- Watch several wave sets before shooting so you can anticipate where and when they break.
- Start with a simple composition and a shutter speed suited to the motion you want to show.
- Review a few images, adjust one setting at a time, and keep your attention on the ocean.
- Pack up before conditions worsen and clean equipment according to its manufacturer’s guidance.
For example, at a broad, lifeguarded beach with a clear view of the break, a beginner can remain on dry sand, use a moderate zoom, and photograph a sequence of waves without entering the surf. Comparing frames afterward reveals how timing, wave shape, and shutter speed affect the result. The same approach can be adapted to a rocky coast or harbor, but those locations may require stricter attention to footing, access, and wave exposure.
Conclusion: the beach is an accessible classroom for surf photography
Beaches are often the easiest place for beginners to shoot surf because they can offer open sightlines, room to practise, and multiple viewpoints from shore. Dry-sand and elevated positions help newcomers learn composition and wave timing, while basic control of shutter speed, aperture, and ISO supports sharper or more expressive images. But coastal access comes with real hazards: rip currents, unexpected waves, changing tides, salt spray, and local restrictions all deserve attention.
Start with a safe, permitted location, check current conditions, and make observation part of the photographic process. For further preparation, consult local lifeguard or park guidance, NOAA tide and weather information, and your camera manufacturer’s care instructions. The best beginner surf photograph is one made with patience, respect for the coast, and a safe distance from the water.
Sources: U.S. Geological Survey, Coastal Change Hazards and the National Assessment of Coastal Change Hazards, https://www.usgs.gov/programs/coastal-and-marine-hazards-and-resources-program/science/coastal-change-hazards; National Weather Service, Rip Currents, https://www.weather.gov/safety/ripcurrent; U.S. Lifesaving Association, Rip Current Safety, https://www.usla.org/page/RIPCURRENTS; National Oceanic and Atmospheric Administration, Tides and Water Levels, https://oceanservice.noaa.gov/education/tutorial_tides/; National Park Service, Leave No Trace: Coastal Areas, https://www.nps.gov/articles/leave-no-trace-seven-principles.htm